CUSTOM HEADWEAR / BUYER GUIDE
Custom Baseball Cap Sample Review: 5 Views to Check
Use five real cap sample photos to review the front, side profile, closure and inside finish before approving a custom baseball cap for your brand.
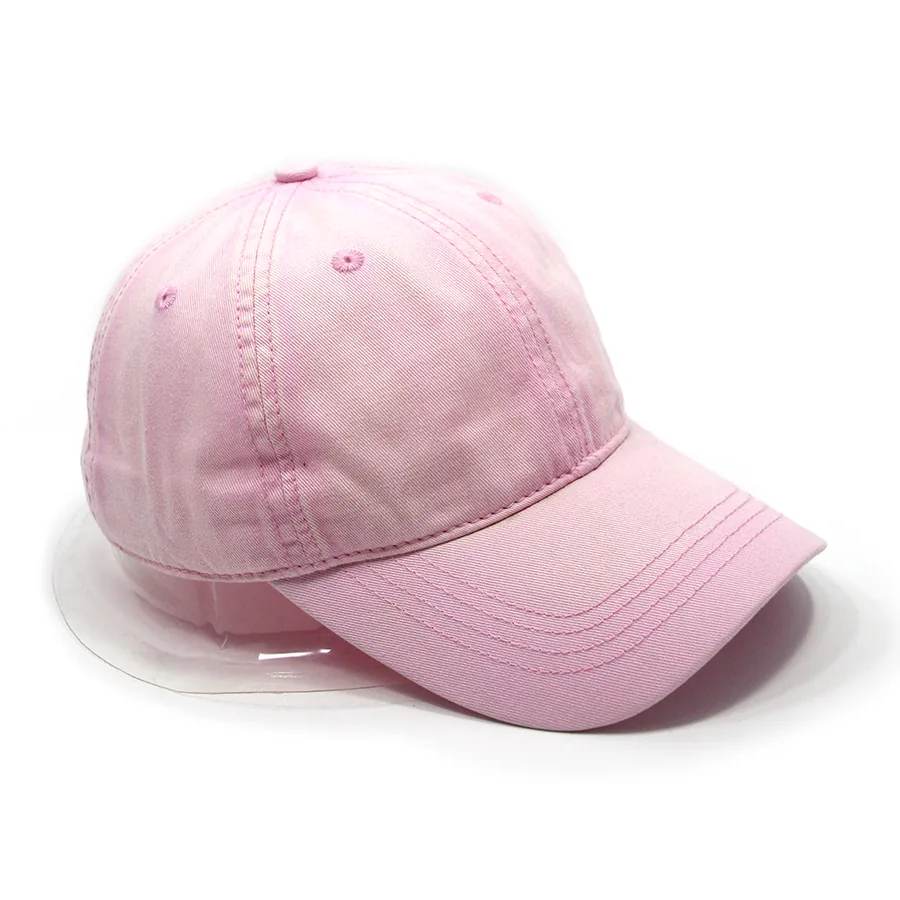
A useful cap sample review starts with a consistent set of photographs and ends with a physical sample checked against your written brief. A front image can show the logo area, but it cannot answer every question about crown shape, the back opening, the closure or the inside finish.
This guide uses five views of a pink cap sample to show what a brand or wholesale buyer can check before approving a custom baseball cap. The photographs illustrate visible construction details. They do not establish the fabric composition, size range, color standard or performance of a future order.
Start with one sample and one version of the brief
Review all five views against the same written specification. Ask for a front view, a side profile, a rear view, an inside view and an overall three-quarter view. Keep the sample reference and artwork version with those images so comments do not get mixed between revisions.
Your brief should identify the intended hat shape, logo method and position, color references, closure, labels and any dimensions already agreed. If a detail has not been decided, record it as a question. A blank space in the brief should not silently become approval of whatever appears in the photograph.
For a first discussion, start with the baseball and dad cap options and identify what you like about a reference: the curved brim, the appearance of the crown, the adjustment system or the decoration area. This is more useful than asking for an “identical cap” without specifying which details matter.
Front view: examine the shape and decoration area
Use a straight-on photograph to compare the front panels, center line and brim alignment. In this sample, the center seam, two front eyelets, top button and several rows of brim stitching are visible. The cap has no front logo, making the panel layout easier to see.
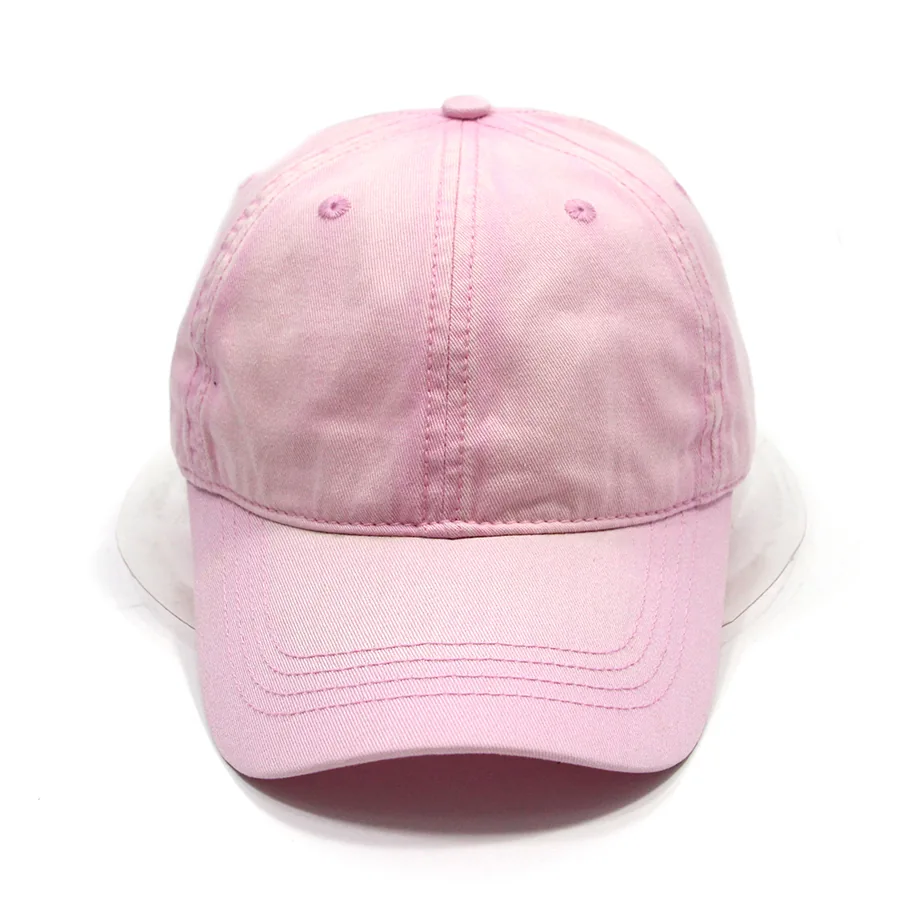
For a decorated sample, compare the proposed logo with the approved artwork. Check its position relative to the center line and brim, and ask for its finished dimensions. A centered design in a digital drawing can still need adjustment when it is applied to a curved, seamed surface.
Write the correction precisely. “Move the logo higher” leaves room for interpretation. A marked image paired with a measurement reference gives the sample team something concrete to check. Confirm the measuring points with the supplier so both sides use the same reference.
If you are still deciding between embroidery, print or a patch, review the method together with the hat material and construction. The clean appearance of an undecorated panel does not prove that every artwork or decoration size will work there.
Side view: check the crown and brim as a profile
A side photograph reveals proportions that a front view can hide. Look at the line from the front of the crown to the back opening, the apparent crown depth, and the angle and curve of the brim. Compare the picture with the shape direction in your brief.
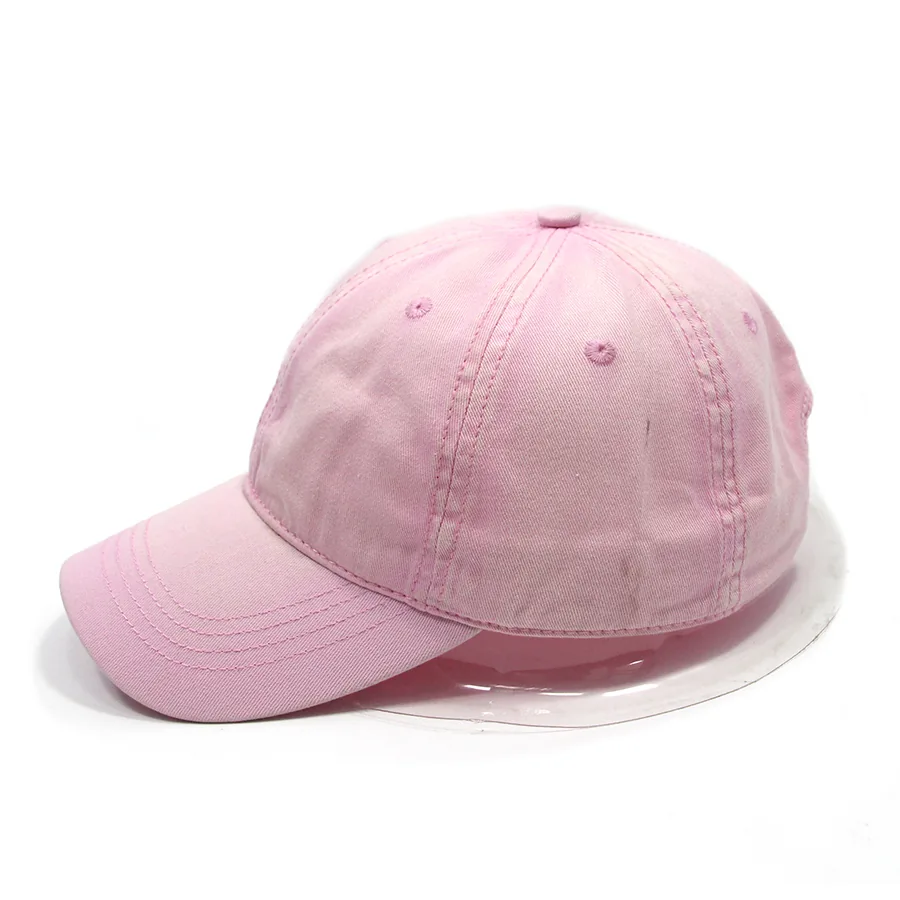
The sample shown rests on a clear display support. A support, camera angle or packing crease can affect how a cap appears in a photograph. Ask how the sample was positioned if the shape looks unexpectedly high, low or flattened. Compare like-for-like views before requesting a construction change.
A photo review should produce a list of points to inspect on the physical sample. It cannot replace a fit assessment on the intended wearer or an agreed head form. If fit is important to the project, agree the sizing and measurement method rather than estimating it from a picture.
If the brim direction is still undecided, use the curved vs flat brim specification guide to separate the curve, measuring points, crown silhouette and closure in your brief.
Rear view: review the opening and closure together
Check the adjustment system as part of the cap, not as an isolated piece of hardware. The rear view of this sample shows a fabric strap, a metal-colored clasp and the opening above the strap. These are visible features; the photograph does not establish the hardware material or its durability.
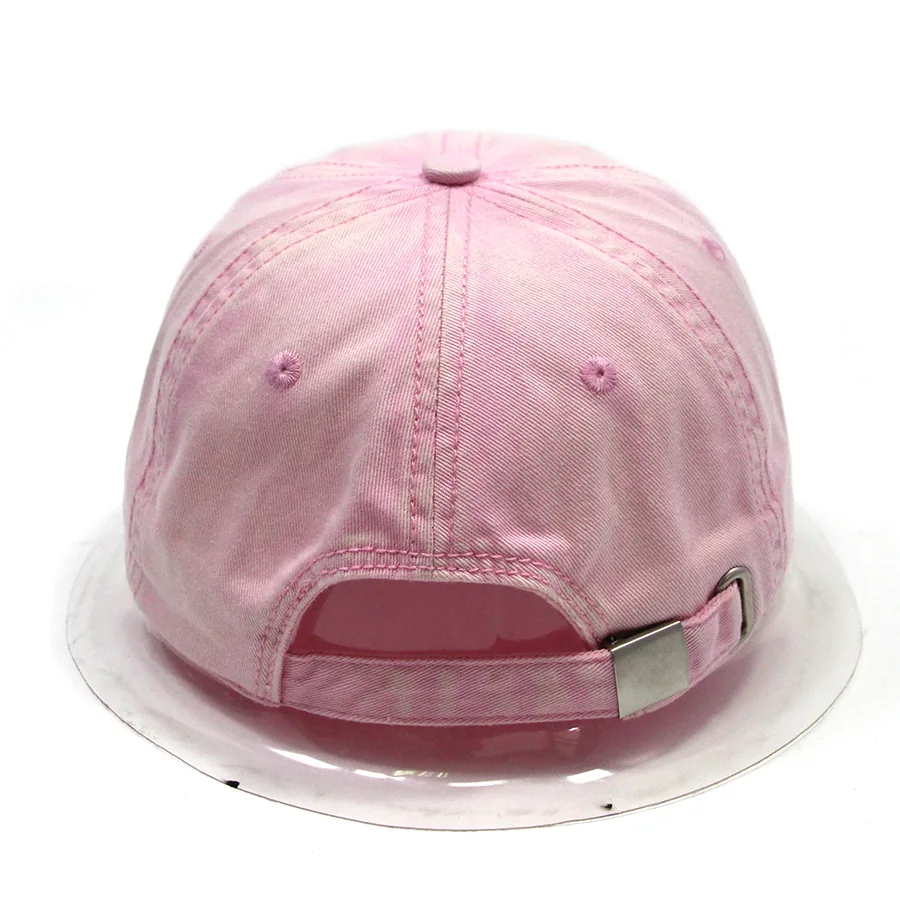
On the physical sample, try the adjustment action and check how the strap is retained. Record the agreed fit range through measurement. If your design includes rear embroidery or a label, confirm its position with the closure in place and check whether the detail remains readable at the intended adjustment.
Discuss any hardware, branding or closure changes before final sample approval. A substitution may affect the appearance or adjustment, so it should be documented alongside the other project changes.
Inside view: look beyond the outside appearance
Ask for an inside view even when the exterior looks correct. It can help you identify the seam covering, inner band, visible stitch finish, label position and underside of the brim. The sample photograph below shows the inside panel layout and covered seams.
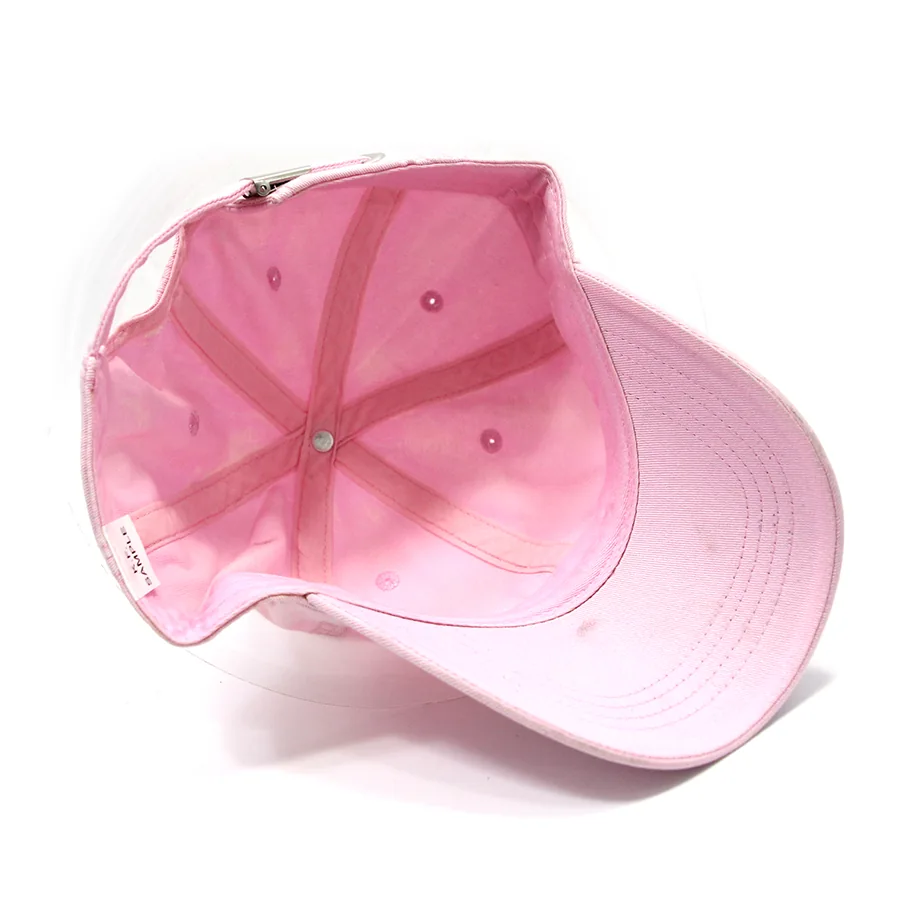
Review the inside against the agreed finish and label requirements. On the physical sample, check the contact areas, loose threads and any exposed edge that needs attention. A close photograph can flag a question, while handling the sample helps you judge details that depend on touch.
Do not use a photograph to infer a fiber blend, a care instruction or a compliance claim. Request the relevant specification or documentation for the actual project. Where a label is required, its wording and placement need their own review; the presence of a label in a reference image does not make its wording appropriate for your order.
Overall view: connect the details to the intended design
Use the three-quarter view as a final visual cross-check. The opening image of this guide shows how the crown, brim, panel seams and color appear together. Return to that view after checking the detail images and see whether the proposed corrections support the overall design you want.
Photographs are useful for discussing color placement and contrast. Lighting, camera processing and screens can change the apparent shade, so final color approval should refer to the physical sample and the color standard agreed for the project. If a washed or faded appearance matters, describe the intended appearance and review the actual material sample.
The 3D Design Studio can help communicate logo placement and color choices early in the discussion. Its output is a design concept. Keep the artwork, measurements and physical sample review together when preparing production instructions.
Turn the review into a short decision sheet
Separate approved details, requested changes and open questions. This gives the next sample round a defined purpose and helps avoid a vague “looks good” being interpreted as approval of every detail.
| Review area | Record in your brief | Confirm on the physical sample |
|---|---|---|
| Front and logo | Artwork version, position and measurement references | Finished decoration, alignment and dimensions |
| Side profile | Desired crown shape and brim curve | Fit and shape under the agreed review conditions |
| Rear and closure | Opening, adjustment system and rear branding | Adjustment action and measured fit range |
| Inside finish | Band, seam finish and label requirements | Feel, finishing details and label wording |
| Color and overall appearance | Color references and any intended finish | Agreed material and color sample |
Name the sample revision in your approval note and keep the supporting photographs with it. If a detail is still unresolved, say which one and what evidence would resolve it. Confirm commercial terms separately: the quantity, materials, decoration and destination all belong in the project discussion.
Ready to prepare your own review? Send a design brief or sample reference to Rongtai with the hat direction, intended quantity, destination and the details you want checked. You can upload original artwork directly or bring a concept from the 3D Studio.