CUSTOM HEADWEAR / BUYER GUIDE
Approving a Custom Hat Color: What Photos Can and Cannot Show
Prepare a custom hat color approval brief: label each color zone, identify its physical reference and review fabric, thread or print on the actual sample.
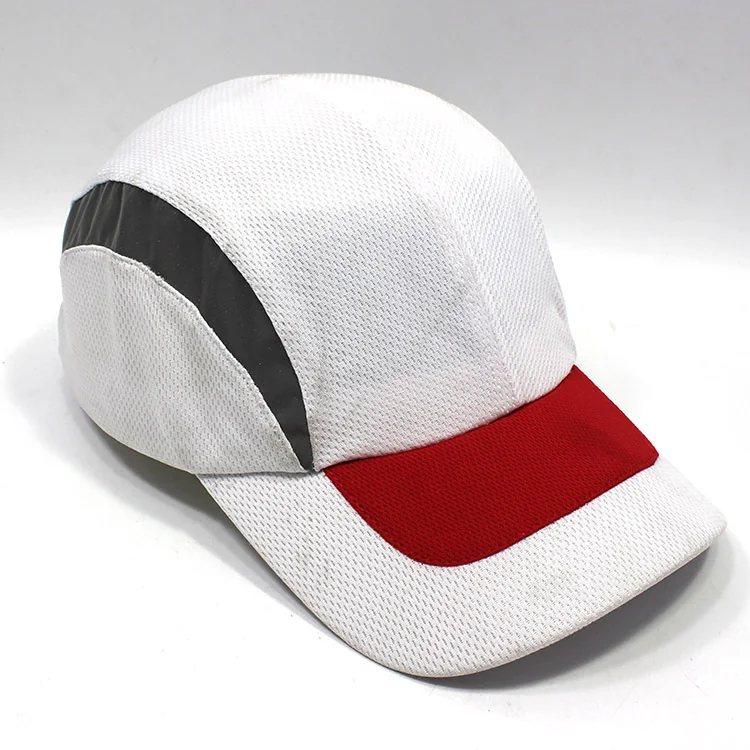
A custom hat color request has two separate parts: where each color belongs and which physical shade the project should use. A photograph can help show a color layout or visual contrast. It cannot, by itself, set a reliable shade standard for fabric, thread or print. Keep the two decisions separate so a visual reference does not get mistaken for final color approval.
Separate the color map from the color standard
Start by listing each area that needs a color decision: for example, the front panels, side panels, brim, mesh, stitching, embroidery or patch. Name the area and identify the reference attached to it. A numbered color map is clearer than a note that says “use the red from the photo,” especially when the same color appears on more than one surface.
| Hat area | Record in the brief | What the photo can help show |
|---|---|---|
| Crown or front panels | Area name, intended color reference and any seam boundary | Which panels should share a color or contrast |
| Side panels or mesh | Separate reference for each zone, even if both are described as black or navy | Where one area ends and another begins |
| Brim | Top, underside or a marked section, plus its reference | Whether the brim is intended to contrast with the crown |
| Decoration | Artwork version and the intended thread, print or patch colors | Approximate position and color relationship to the hat |
Treat these as separate records: the color map explains placement, while the color reference explains the shade you want reviewed. If you supply a numbered color code, swatch or previously approved sample, identify it by name or revision and say which hat area it applies to. Ask the supplier to confirm how that reference will be reviewed on the selected surface and decoration method. A code or image alone does not prove that different materials or processes will look identical.
Mark boundaries so the sample team can follow them
Use a plain front, side and rear view where possible. Add arrows or area labels such as A, B and C; mark the seam or edge where one color should stop; and keep the unmarked original beside the annotated copy. If the boundary should follow an existing seam, say so. If it should cross a panel, show the intended line rather than relying on a verbal description.
A useful map distinguishes the zone from its shade. For example, the image below makes the red brim section and dark side area easy to point out. Use it to discuss where those color blocks sit and how they contrast with the white panels. Do not use its pixels as the approved shade for a production order.
For a trucker hat, name the front and mesh references separately and mark their join on both sides. The trucker sample guide covers the front-to-mesh boundary; this guide adds a project-wide way to record color references and sample decisions.
Use photos and 3D previews for the right decision
Photos are useful for showing location, relative contrast and the overall direction of a design. A consistent set of front and side views also helps reviewers compare revisions. But lighting, camera processing, display settings and the surface in the image can change how a color appears. Two photos can look different even when they are meant to represent the same reference, and a similar-looking screen color does not confirm a physical match.
A 3D preview has a related role: it can help communicate an early arrangement of colors and a logo. It is a concept for discussion, not a physical sample or a color measurement. You can use the 3D Design Studio with your marked references, then confirm the chosen shades against the agreed physical swatches or hat sample. The fabric and color customization notes explain how to share color references with the project brief.
Review each color on the physical sample
Before approving a sample, keep the following together: the dated brief, the color map, the reference or swatch identifiers, the artwork version and the sample revision. Compare each hat area with the reference that applies to it, rather than judging the whole cap from one overall photograph. Review decoration colors separately when thread, print or a patch is involved.
When requesting a change, identify the area and reference directly: “Keep areas A and B as shown in the approved sample; revise area C against color reference [name or ID].” Replace the bracketed words with the actual project reference. This makes it easier to tell a requested shade change from a change in placement.
Record the decision by sample revision: approved areas, requested changes and open questions. If a later sample changes one color or boundary, note which earlier decisions remain approved. A clear revision note prevents an unchanged area from being treated as newly approved just because another color was updated.
A short color-approval checklist
- Label every color zone on a marked view and connect it to a named reference.
- State whether each image shows placement, contrast or shade direction.
- Keep the original artwork and reference files with their version or revision.
- Compare the physical sample with the agreed reference on each relevant surface.
- Record approved areas and requested changes against the sample revision.
The broader baseball cap sample review shows how to check color alongside the cap’s front, side, rear and inside views. When your references are ready, send Rongtai your hat direction and color questions; include the intended quantity and destination so Alex can discuss the next project-specific review.