CUSTOM HEADWEAR / BUYER GUIDE
Custom Trucker Hat Sample: Check the Front Panel and Mesh Join
Use real front, side and inside cap views to document a trucker hat's front-to-mesh join, logo clearance and color boundary before approving a custom sample.
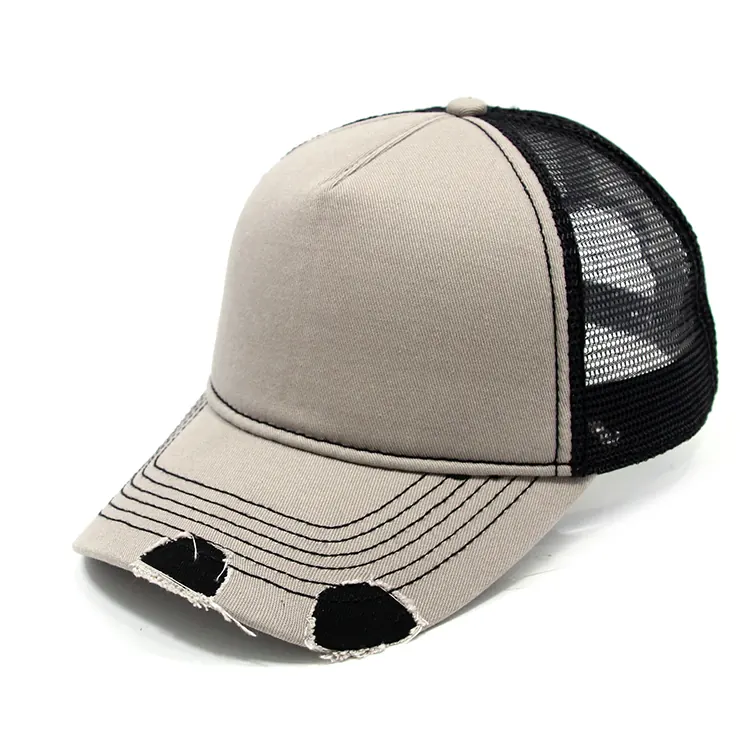
A trucker hat can look right from the front yet leave a key construction question unanswered: where does the front fabric end and the mesh begin? For a custom order, mark that boundary on the left and right sides of one sample before approving artwork or color. A front photo alone cannot show whether the join follows the same path on both sides.
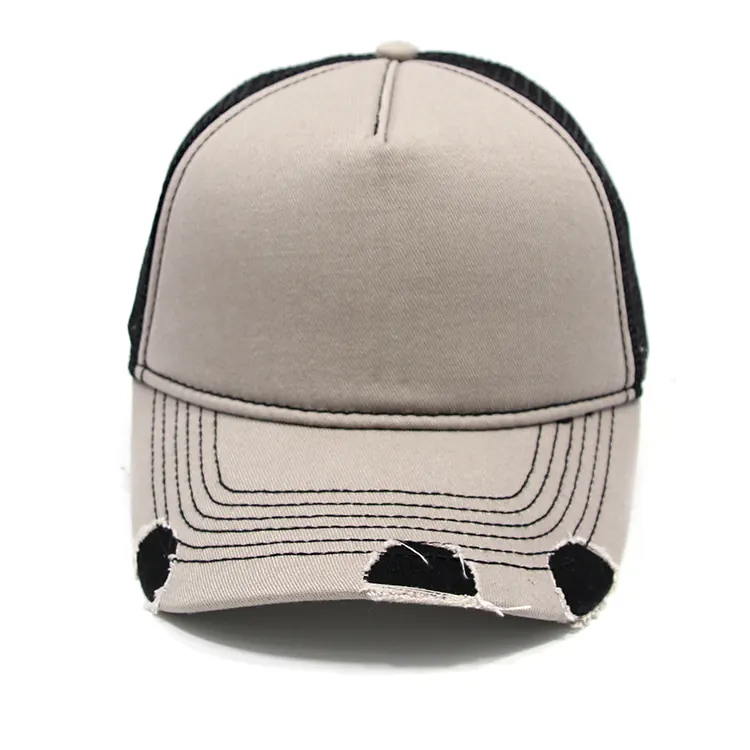
This guide focuses on the front-to-mesh transition. For a broader choice of crown, brim and closure, see the trucker hat product directions. The light-front, black-mesh cap in these photographs is a visual reference, not a measurement or proof of a material specification. Its cutout brim is a detail of this particular reference, not a requirement for a trucker hat. Use your actual sample and a written brief to confirm the finished construction.
Trace the front-to-mesh boundary on both sides
Ask for left and right side photographs of the same sample revision. Draw a line over each image where the solid front meets the mesh. Note whether the line begins near the front crown, where it reaches the lower edge, and how it relates to the brim and rear opening. A side view helps the buyer explain the intended look much more precisely than “make it like this trucker cap.”
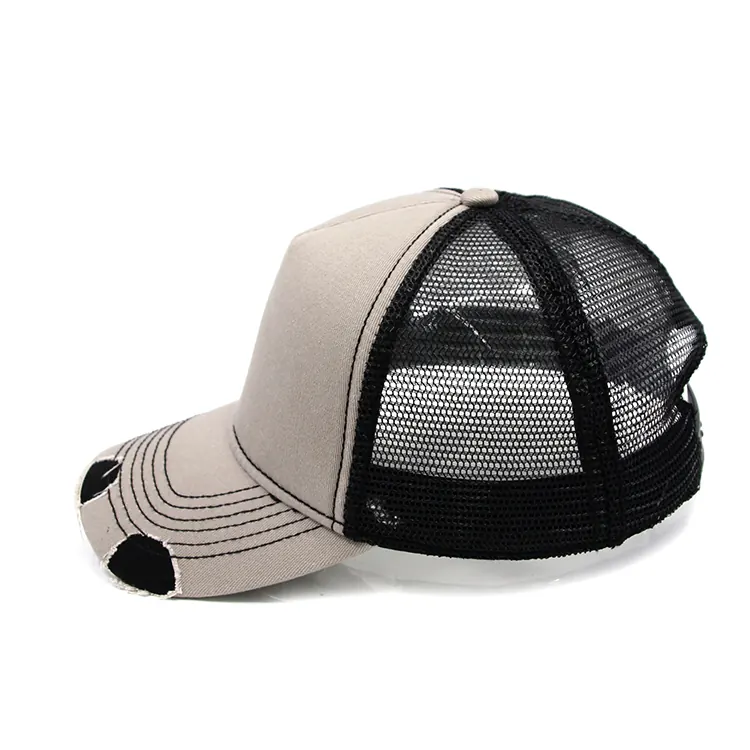
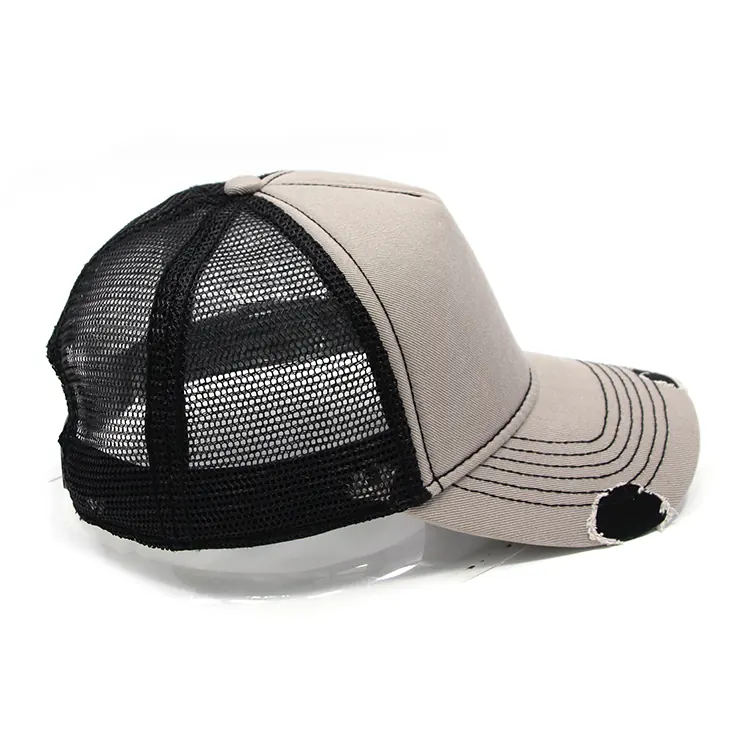
If one side seems different, check the physical sample before deciding whether the difference comes from construction, camera angle or the way the cap was positioned. Record the agreed reference photographs and sample revision; otherwise two team members may approve different versions of the same design.
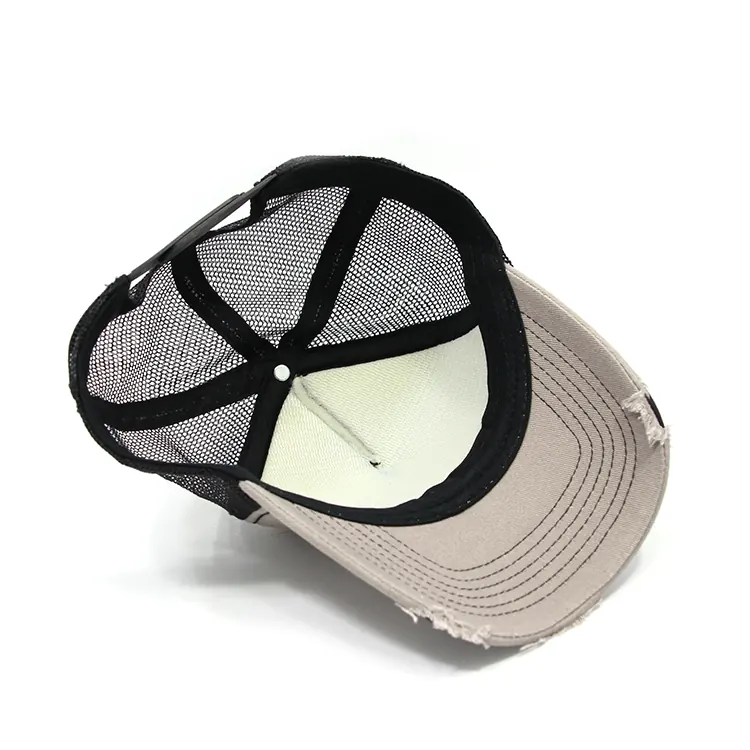
An inside close-up can help identify where the materials meet and whether a seam covering is visible. It cannot establish seam strength, fabric composition or long-term performance. Request the actual specification and review the sample if those points matter to the order.
Keep the logo clear of an uncertain join
Start with the artwork file, proposed method, width and height. Mark its center line and edges on the front photograph, then compare the marks with the front-to-mesh boundary in the side views. If the design is a patch, include the finished patch edge in this check, not just the printed artwork area. Ask where a side label would attach if the buyer wants one; a screen mockup does not establish the available attachment area.
The embroidery, print and patch options help frame the decoration discussion. A logo may appear to fit on a flat image while the cap curves around the head. Confirm final placement and appearance on a physical sample made with the selected artwork and decoration method.
For a separate decision about how many crown pieces meet at the front, use the five-panel versus six-panel guide. Panel count and the solid-front-to-mesh join should be specified as separate lines in a buyer’s brief.
Describe front and mesh colors separately
Name the intended front color and mesh color independently, even if both are called “black” or “navy.” Attach a reference for each area and say which photograph is for placement versus color direction. Lighting and screens can shift the appearance of both materials. Approve a physical swatch or sample when the shade matters; do not use a web photograph as an exact color standard.
The 3D Design Studio can communicate an early cap and logo concept. Send that preview alongside the marked photographs, original artwork and requested color references. The preview should not replace the agreed measurements or the sample review.
Send a brief that a sample team can check
| Decision | Put in the brief | Check on the sample |
|---|---|---|
| Front-to-mesh line | Marked left and right views from one reference cap | Boundary path and appearance on both sides |
| Front decoration | Artwork version, method, intended size and measured position | Finished logo or patch edge relative to the join |
| Two-color direction | Separate front and mesh references | Approved physical shades and their placement |
| Remaining cap details | Brim shape, rear closure and any side label position | Same-revision front, side, back and inside views |
A useful request might say: “Please keep the front-to-mesh line shown in the attached left and right references. Our patch edge should stay within the front area; the artwork file and intended dimensions are attached. Please show both side views and an inside close-up of the sample before approval.” Change those instructions to match your actual design.
Use the five-view sample review guide for a fuller physical review. When ready, send Rongtai your own design or marked references with your estimated quantity, destination and open questions. Alex can clarify the available options and the next sample discussion.