CUSTOM HEADWEAR / BUYER GUIDE
Sports Cap Center Strip and Edging: A Sample Brief
Turn a photographed cap center strip and red edging into a marked sample brief. Check boundaries, front join, logo clearance and the physical sample.
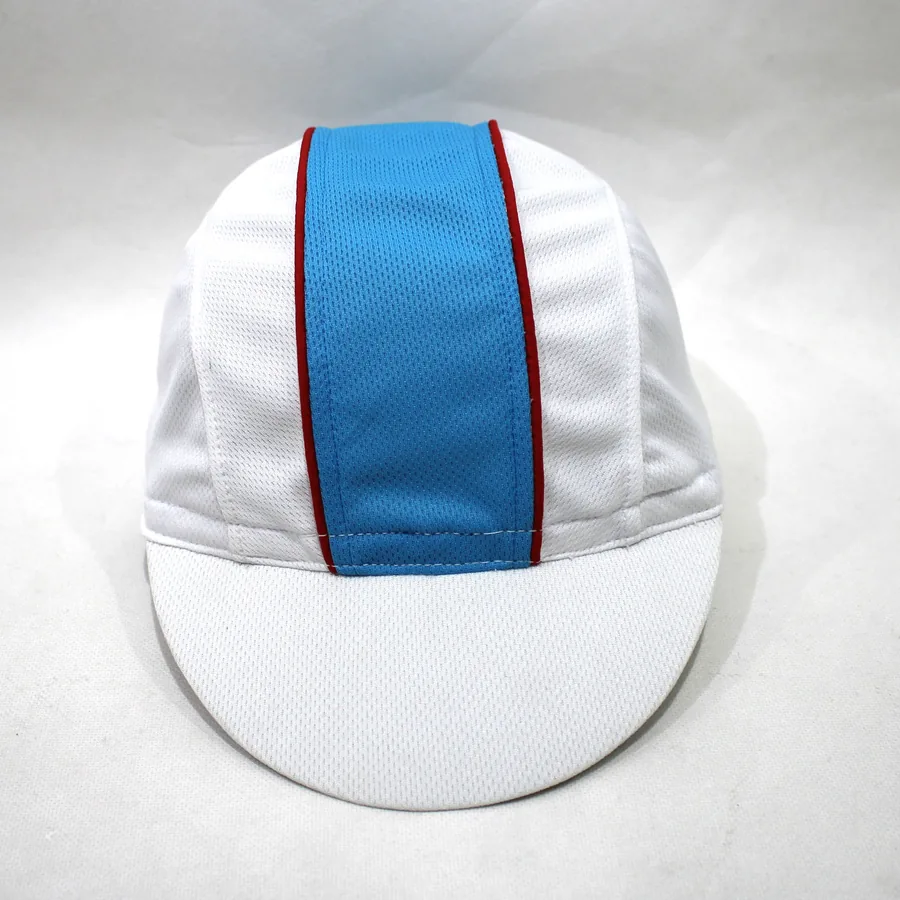
A front photo can make a custom cap’s colors look settled while leaving the construction brief open. In the reference above, a blue center area runs down a white short-brim cap, with narrow red edging on either side. The photo shows where those visible boundaries sit. It does not tell a buyer whether the blue area is a separate piece, how the red edging is made, or what happens on the back and inside.
This guide turns that one visible layout into questions a supplier can answer on a marked drawing and a physical sample. Keep the center-strip boundaries and front join on this sheet; confirm the total panel count and exact shades separately.
Separate what the photo shows from what the brief must decide
Start with the photograph as a visual reference, not a construction specification. Put a number on each open question so the sample team can reply to the same revision of the design.
| In this front view | Ask the supplier to confirm on the proposed sample |
|---|---|
| A blue area is centered between white areas. | Is it a separately cut piece, a surface treatment, or another construction? Show the proposed inside view. |
| Narrow red edges run along both sides of the blue area. | What is the proposed edge method, and where does each red line begin and end? |
| The blue area meets the white brim at the front. | How will the strip and both red edges finish at this join? Mark the exact meeting points. |
| The front has no visible logo. | Which finished area is reserved for the buyer’s artwork, and how far is it from the color boundaries? |
The photograph cannot confirm a total panel count, fiber content, breathability or tested sports performance. If those matters affect your order, request the relevant specification or evidence separately. The five-panel versus six-panel guide covers the wider crown-seam question.
Give the strip three named measurement points
“Blue stripe in the middle” is too loose for a repeatable sample. On a front and top drawing of the same proposed cap, mark the centerline and the intended blue width near the crown top, halfway down the visible front, and immediately above the brim join. Name the points on the drawing. If the width should taper, show where that change starts; if it should stay visually even, state that as the target to check on the sample.
Mark the left and right red boundaries separately. Show their starting positions, their path beside the blue area and their endpoints at the front join. Do not assume the red treatment continues around the back because the reference photo stops at the front. Ask for a rear and inside view of the proposed sample before approving any continuation or seam treatment.
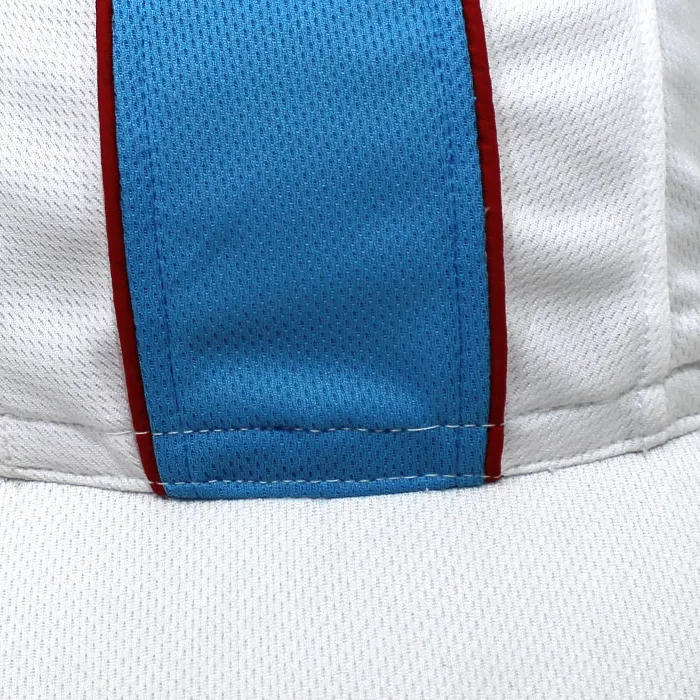
Detail from the same reference photo: the two red edges and blue area meet the white brim at the front. The image shows placement, not the underlying edge or seam method.
Confirm the edge method and logo space on a physical sample
An edge can look similar in a photograph even when its construction differs. Ask the supplier to label the proposed blue-area construction and red-edge method on the sample sheet, with a close inside photo or a physical reference where needed. Compare both sides of the finished sample for visible alignment, the width of the blue area at the named points, and where the red lines stop above the brim. Record any asymmetry as a precise revision request rather than “make it neater.”
If this is a branded cap, include the artwork version and intended finished size. Mark whether the logo should sit on the blue center area, a white side area or another location. Check the clear distance from the red edges and any visible seam on the actual sample before approving placement. The customization overview explains the logo and OEM discussion. Use the 3D studio for an early cap-color and logo-position concept; attach your marked drawing for the center strip and edging. A screen view cannot resolve their construction or finished color.
For shade approval, use an agreed physical reference for the blue, red and white areas and review it under your chosen conditions. The physical color-approval guide gives that separate workflow; this brief records where each color stops.
Send one versioned sample note
Keep the drawing, image and requested changes under one sample revision. A short note can make the decision traceable:
Reference image: white cap with blue center area and two red edges. Sample revision: [ID]. Blue width: [named top, middle and front-join points on drawing]. Red edges: [left/right start and end points]. Construction: [supplier to identify and show inside]. Logo: [artwork version, finished size and marked location]. Open checks: [rear, inside, edge finish, color reference]. Decision: [approve / revise / unanswered].
Compare the revised physical cap with that exact note before changing the approval status. If the logo moves or the front join changes, update the drawing and version together. You can browse the sports-use headwear direction for an initial style conversation, then send Alex your marked sample brief with the artwork, intended quantity and destination. Any production detail, quantity threshold or schedule should be confirmed for your specific project.